Recently, we posted a three-part series on using a VHD in Windows 7 to create a secure, portable file for storing your data (Create a Portable, Secure File Store in Windows 7 – Part I, Create a Portable, Secure File Store in Windows 7 – Part II, and Create a Portable, Secure File Store in Windows 7 – Part III).
If you also use Windows XP on another computer, you can transfer that VHD file to the XP computer and mount it without having to run Virtual PC or Microsoft Virtual Server. You can install only a component of Microsoft Virtual Server and run a command from the command line.
NOTE: If you have applied a password to your VHD file using BitLocker in Windows 7, as discussed in the third part of the series mentioned above, you CANNOT access your VHD file in Windows XP. You will be asked to format the drive.
Download Microsoft Virtual Server from
http://www.microsoft.com/downloads/details.aspx?FamilyId=BC49C7C8-4840-4E67-8DC4-1E6E218ACCE4&displaylang=en.
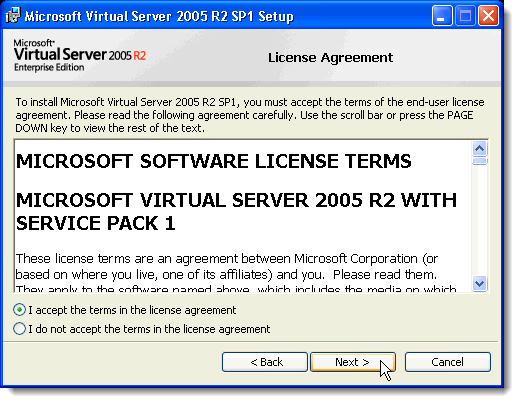
Start installing Microsoft Virtual Server by double-clicking on the setup.exe file. The initial Microsoft Virtual Server 2005 R2 SP1 Setup screen displays. Click the button next to Install Microsoft Virtual Server 2005 R2 SP1.

The
License Agreement displays. Select the
I accept the terms in the license agreement radio button and click
Next.
The
Customer Information screen displays. Enter your
User Name and
Organization. The
Product Key is automatically entered. Click
Next.
On the
Setup Type screen, select the
Custom radio button and click
Next.
On the
Custom Setup screen, click on the button next to the first feature in the list,
Virtual Server Service, and select
This feature will not be available from the pop-up menu.
Do the same thing for all the features except the
VHD Mount feature. The
Custom Setup screen should look like the following image. Click
Next.
The
VHD Mount feature is ready to be installed. Click
Install.
The progress of the installation process displays.
When the
Setup Complete screen displays, click
Finish.
In Windows Explorer, navigate to the
C:\Program Files\Microsoft Virtual Server directory. In the right pane, hold down the
Shift key while right-clicking on the
Vhdmount directory. Select
Open Command Line Here from the pop-up menu.
At the command prompt, enter the following line.
"vhdmount /p /f < path to VHD file > Replace “
” with the location of the VHD file you want to attach. Press
Enter. You should see a message indicating the Virtual Hard Disk was successfully plugged in.
NOTE: For information about the parameters for the
vhdmount command, type
vhdmount at the prompt and press
Enter. A list of available parameters with descriptions displays.
In Windows Explorer, your VHD file displays as a hard drive with a drive letter.
To detach your VHD file, enter the following line at the command prompt:
"vhdmount /u < path to VHD file > Again, replace “
” with the location of your VHD file.
If you still have Windows Explorer open and your VHD selected, you will receive an error when you try to detach the VHD file. You must either select a different drive, or close Windows Explorer.
Once the VHD file is no longer being used, you can enter the detach command again and you should see a message indicating that the virtual hard disk has been successfully unplugged.
This component of
Microsoft Virtual Server is useful if you transfer files between a Windows 7 computer and a Windows XP computer. You can keep all your files in one portable file and easily access them on both operating systems.
by Lori Kaufman
 Twitter
 Facebook
 Flickr
 RSS
RSS