How to A Better Way to Copy-Paste and Move Your Files

0 comments

Copy-pasting and moving large files on your computer used to be long process with lots of popup dialogs and lots of dragging and dropping. This gets even worse when transferring hundreds or thousands of files from one hard-disk partition to another (such as moving from your local hard drive to an external disk). But now, with the help of Copy Handler, doing this is much more doable.
By using Copy Handler, users now have a complete control over the pasting and moving of the copied files with the program’s Pause, Restart, Cancel, Remove, Advanced, Resume, auto-resume, and auto-queue commands.
This software is very applicable to those who are pasting or moving a large number of files from several directories or folders to another disk drive (whether it is local or external).
If you want to try this tool, go to http://www.copyhandler.com/en/download and click the DOWNLOAD NOW link.
 Press the Save File button.
Wait for the download to finish, and then launch the setup file.

 Most web browsers will prompt you with a window just like the one below. To proceed with the installation, click Run.
The setup wizard will give you an installation run-through. Follow all its processes.

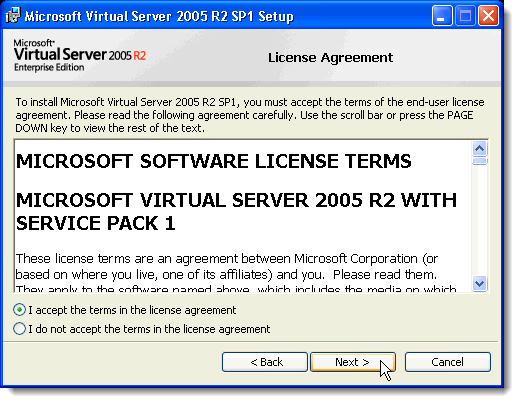
When the setup is complete, check Launch Copy Handler and press Finish.
Copy Handler’s icon will then be placed on your system tray.

It’s now time to see the functions of this program. As an illustration, we will copy and paste more than 600 big-size wallpapers.
 This is our destination folder. As you can see, it’s an external USB disk drive.
We can use Copy Handler in two ways. The one I will demonstrate below is the typical one. I will illustrate the second method later.
To paste, just right-click your mouse on the destination folder and hit (CH) Paste.
The mini-status window will then appear on top of your system tray.
If you want to see the full statistics of the pasting process, just right-click Copy Handler’s tray icon and press Show status.
Below is the Status window. In here, you can Pause, Resume, Restart, Cancel, and Remove the current pasting or moving process. During the pasting, you can Pause the process and change the location of the files. You can do this by clicking the Advanced > button.
In here, you can also set the speed of the transfer rate. If you want the pasting to be faster than the usual, just click the Thread priority button and select one these options: Time critical, Highest, and Above normal. Before you can use this feature, you have to pause first the operation you want to be prioritized.
The Global Statistics box will show you the current pasting’s transfer rate.
 The second way of using Copy Handler is through the Enter copy parameters command.

This method is a more adoptable, powerful, and convenient way of pasting / moving files. First, you’ll just have to add files or folder you want to be pasted or moved.
What’s great about this procedure is that you can select several files or folders to be transferred. This is a good thing if you want to move thousands of files to an external disk. You don’t have to constantly select, copy, and then paste the files.
 After adding the files and / or folders, specify the destination folder, identify the operation type & priority, and input the count of copies. When you’re done with this step, click the OK button to begin the transferring.

How to organize the Start Menu in XP

0 comments

By default, Windows XP shows the 6 most accessed programs in the Start Menu.  If you open one program many times, it will remove one of the other programs to give space for the new program on the list.What if you want to add more programs to the list?  In this article I will show you how to do just that and also how to make items on this menu appear permanently.

First let’s deal with how to make a program permanent on this list so that no matter if you open this program or not, it will still be in the “popular” list. To do that right click the program and click “Pin to Start menu

After this you will see the program climb to the permanent portion of the menu.  You should see a horizontal bar separating the permanent items in the upper section from the popular items in the lower section.


Now to adjust the number of programs that display on the “popular” list, follow the steps below:
Step 1. Right-click the Start then click Properties:

 Step 2. Choose Customize:

 Step 3. Click the General tab then enter the number of programs

Click OK then check to see if the changes were made to the Start Menu.  One thing to note on the General tab is that you can uncheck or change the default Internet and Email programs on the Start Menu.
You may also choose to clear the list of popular programs to restart the “popularity” contest of your most frequently opened programs. You can choose to use either small and large icons.  Experiment and see which setting you prefer.
I hope this post helps you better organize your Start menu programs.

How to Attach a VHD File in Windows XP

0 comments

Recently, we posted a three-part series on using a VHD in Windows 7 to create a secure, portable file for storing your data (Create a Portable, Secure File Store in Windows 7 – Part I, Create a Portable, Secure File Store in Windows 7 – Part II, and Create a Portable, Secure File Store in Windows 7 – Part III).
If you also use Windows XP on another computer, you can transfer that VHD file to the XP computer and mount it without having to run Virtual PC or Microsoft Virtual Server. You can install only a component of Microsoft Virtual Server and run a command from the command line.

NOTE: If you have applied a password to your VHD file using BitLocker in Windows 7, as discussed in the third part of the series mentioned above, you CANNOT access your VHD file in Windows XP. You will be asked to format the drive.
Download Microsoft Virtual Server from
http://www.microsoft.com/downloads/details.aspx?FamilyId=BC49C7C8-4840-4E67-8DC4-1E6E218ACCE4&displaylang=en.
Start installing Microsoft Virtual Server by double-clicking on the setup.exe file. The initial Microsoft Virtual Server 2005 R2 SP1 Setup screen displays. Click the button next to Install Microsoft Virtual Server 2005 R2 SP1.

The License Agreement displays. Select the I accept the terms in the license agreement radio button and click Next.


The Customer Information screen displays. Enter your User Name and Organization. The Product Key is automatically entered. Click Next.
On the Setup Type screen, select the Custom radio button and click Next.
On the Custom Setup screen, click on the button next to the first feature in the list, Virtual Server Service, and select This feature will not be available from the pop-up menu.
Do the same thing for all the features except the VHD Mount feature. The Custom Setup screen should look like the following image. Click Next.
The VHD Mount feature is ready to be installed. Click Install.
 The progress of the installation process displays.

When the Setup Complete screen displays, click Finish.
 In Windows Explorer, navigate to the C:\Program Files\Microsoft Virtual Server directory. In the right pane, hold down the Shift key while right-clicking on the Vhdmount directory. Select Open Command Line Here from the pop-up menu.
 At the command prompt, enter the following line. 
"vhdmount /p /f < path to VHD file >
Replace “” with the location of the VHD file you want to attach. Press Enter. You should see a message indicating the Virtual Hard Disk was successfully plugged in.
NOTE: For information about the parameters for the vhdmount command, type vhdmount at the prompt and press Enter. A list of available parameters with descriptions displays.
 In Windows Explorer, your VHD file displays as a hard drive with a drive letter.


To detach your VHD file, enter the following line at the command prompt:
"vhdmount /u < path to VHD file >
Again, replace “” with the location of your VHD file.
If you still have Windows Explorer open and your VHD selected, you will receive an error when you try to detach the VHD file. You must either select a different drive, or close Windows Explorer.
Once the VHD file is no longer being used, you can enter the detach command again and you should see a message indicating that the virtual hard disk has been successfully unplugged.
This component of Microsoft Virtual Server is useful if you transfer files between a Windows 7 computer and a Windows XP computer. You can keep all your files in one portable file and easily access them on both operating systems.
by Lori Kaufman